In this tutorial you will learn how to design from scratch a manual test including 1 very simple test case and link it with some existing requirements.
This activity is performed by the Test team and only users having specific rights can access the Test Management module in XQual.
Create a test
In the Test tree, select the root folderEnter the name of the category, select the launcher
tree_step_manual.jar (there are nearly 60 launchers including 5 different interfaces for manual testing) in the launcher combobox and submit.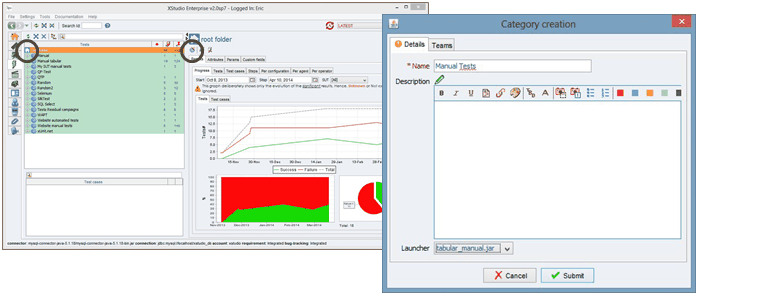
Select the newly added category and click on the button
Enter the name of the folder and submit.
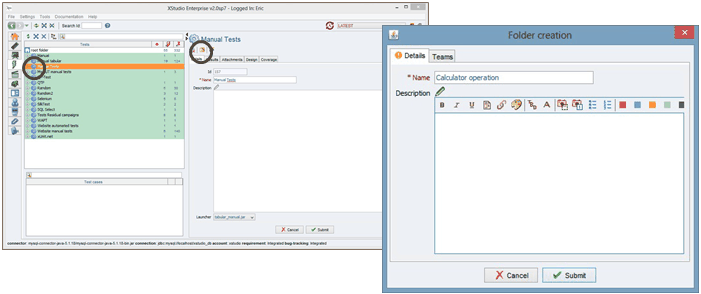
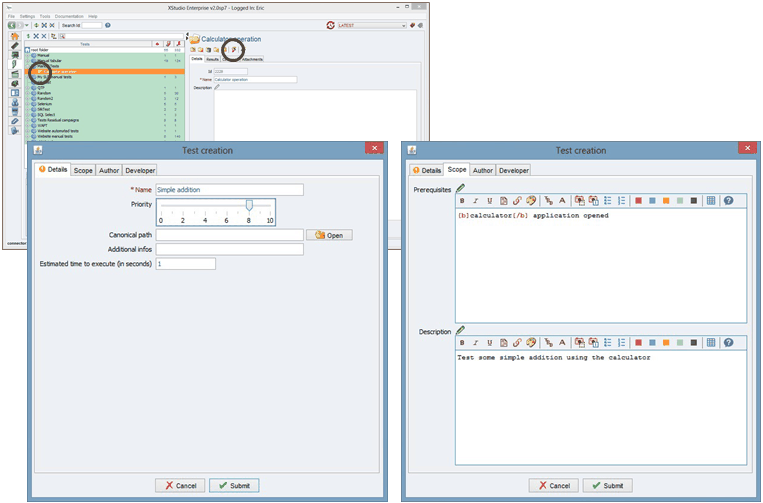
Select the newly added folder and click on the button
In the Details tab, enter a name and a priority for the test.
In the Scope tab, enter the prerequisites to execute this test and a basic description of what you intend to test (you can use the formatting tools to format the text if you wish).
Submit.
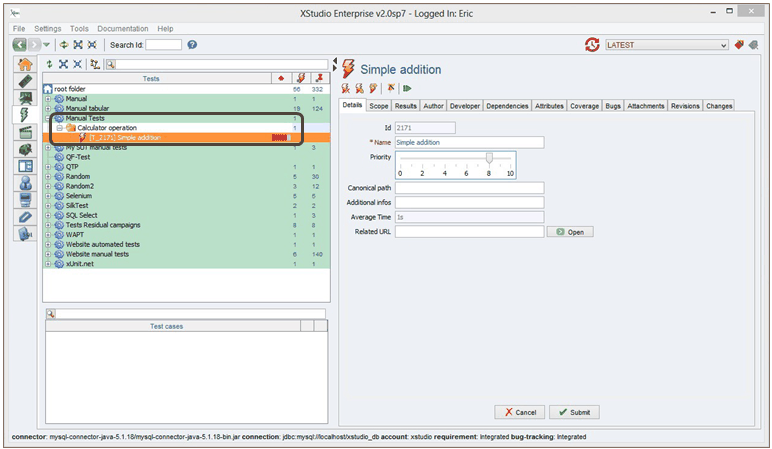
Your test has been created and you can see its priority in the tree.
Create a test case
Select the newly added test and click on the buttonIn the Details tab, enter the index and the name of the test case (index are used to order the test cases so just start with index =
1)
and a detailed description of the scenario.- If you want this test case to be already executable manually, tick the ready for manual run checkbox.
- If the test is already automated (an automated script exists), tick the ready for automated run checkbox.
If you want to describe more in details the test case procedure using a grid (or a tree), select the Procedure tab and insert as many rows as necessary using the
Each row can contain a step description and some expected results to check.
Submit.
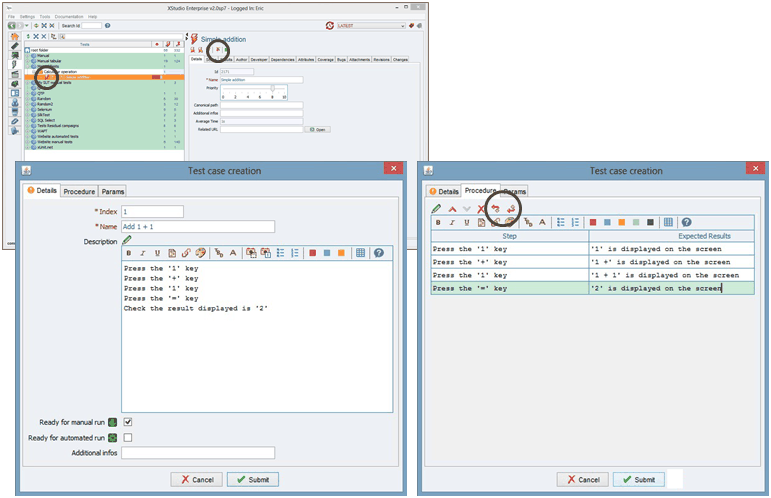
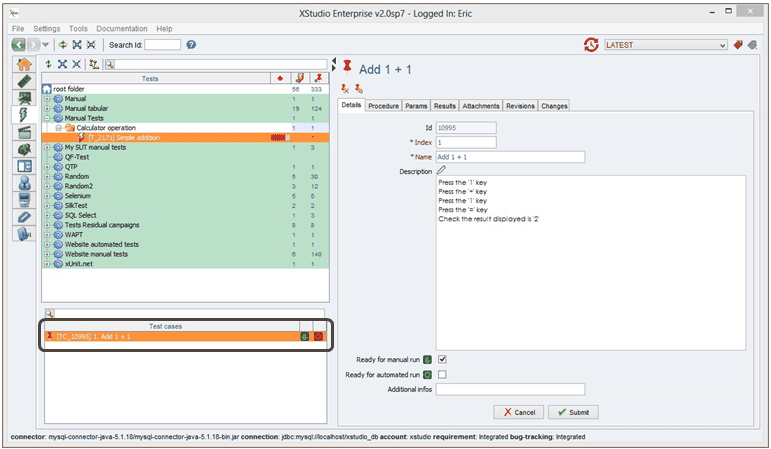
Your test case has been created and you can see in the tree if it's marked to be ready for manual and/or automated run.
Link the test with its requirement
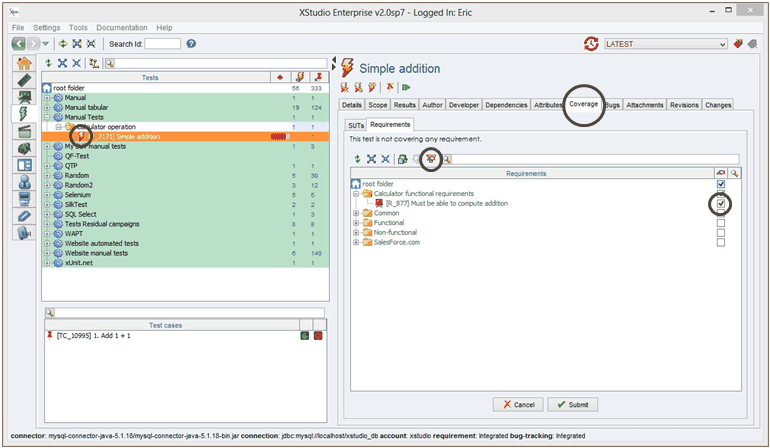
Select the test, click on the Coverage tab, then Requirements sub-tab.Untoggle the button to show all the available requirements, select your requirement and submit.
If you go back on the Requirements tree, the coverage column will now indicate 100% for your requirement.
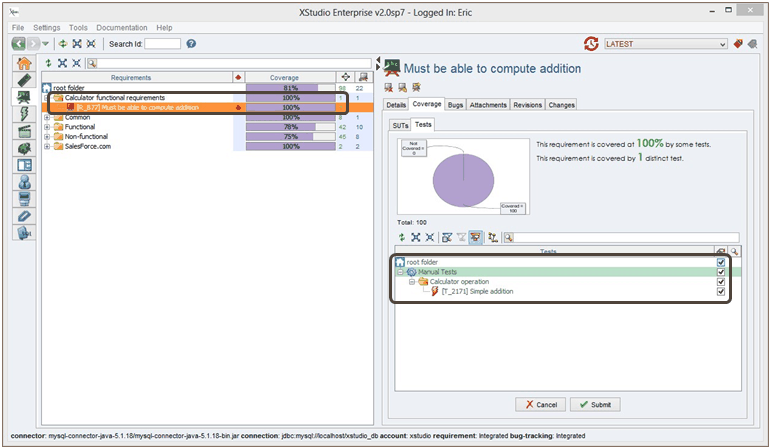
But we've linked only 1 test to the requirement so it's probably far from being enough to "cover" this requirement.
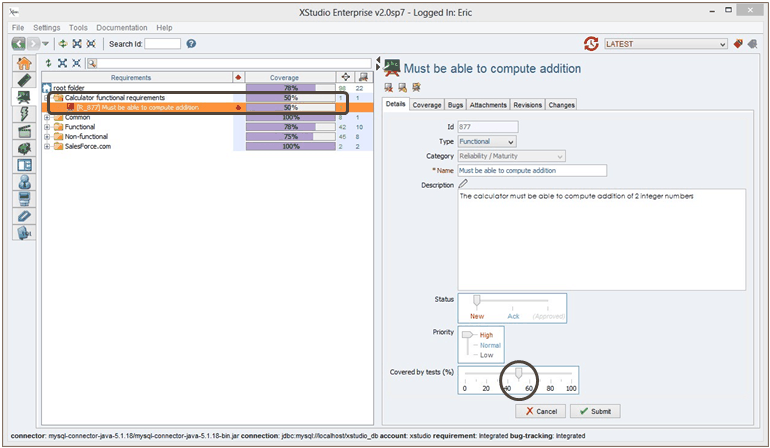
At this point, if you wish to, XQual allows you to refine manually the estimated coverage of the Requirement in terms of tests (while other Test Management application usually don't). Let's estimate we created only 50% of the necessary tests to cover the Requirement (i.e. we think we will need one more test). In the Details tab of the Requirement just move the Covered by test slider to 50% and submit.
Now the system knows that some tests are still to be added and displays a local coverage of 50%.
The coverage is computed real-time so that upper layers in the tree have their coverage updated as well. With only 1 Requirement it's not really useful but when you'll have many Requirements this will be an interesting information to know the consolidated coverage of all the Requirements in a specific folder.
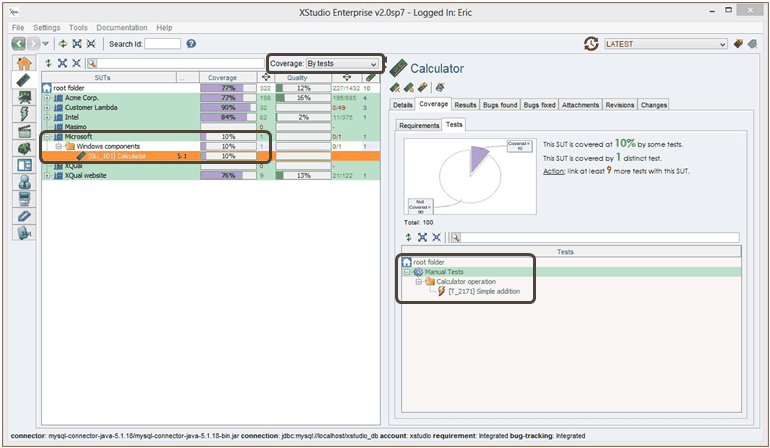
If you go back on the SUT tree and select Coverage: By Tests, the coverage column will now indicate 10% for your SUT.
This is based on the fact that the SUT is covered by some requirements at 20% and those requirements are covered at 50% by some tests. We are here in a very simple case but the consolidation of the coverage of many SUTs having each a different local coverage (in terms of requirements) and many Requirements having each a different coverage (in terms of tests) is going to give some more interesting indicators at Company and Folder levels.
Next step will be to add more requirements and more tests. At any moment you can refine the coverage of:
- a particular SUT in terms of requirements - a particular Requirement in terms of tests The system will consolidate the global coverage from ALL these individual information.
In addition, the system will consider the priority of the elements as some weight in this complex calculation to have a as-reliable-as-possible coverage indicator.
The next tutorial will teach you how to execute your tests and report bugs.


